Want to change your look without going to a salon? The ombre hair trend is popular for its beautiful mix of colors that can enhance any hairstyle. With its smooth color transition and easy upkeep, ombre highlights your natural beauty and lets you personalize your style.
This guide will show you how to ombre your hair at home. We’ll help you choose the right shades for your skin tone and teach you application techniques for a perfect finish.
Say goodbye to costly salon visits and hello to DIY confidence! Whether experienced or a beginner, our step-by-step instructions will help you get salon-quality results at home. Get ready to express your style and enjoy a fresh new look!
What is ombre hair?
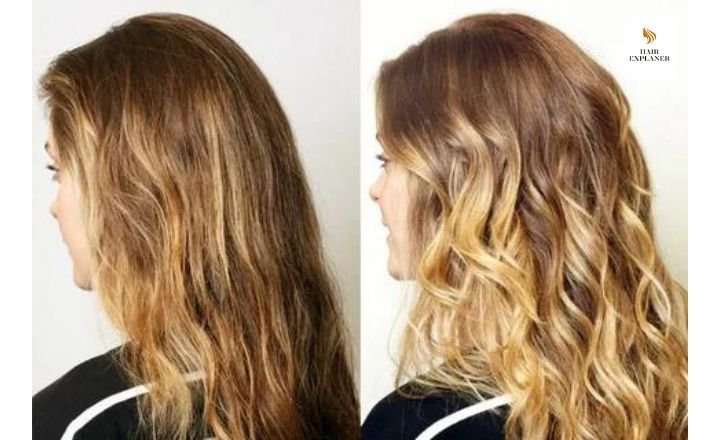
Ombre hair is a beautiful coloring technique that blends two or more colors, starting with a darker shade at the roots and transitioning to a lighter one at the tips. This method adds depth to hair and creates a sun-kissed look that can be bold or subtle.
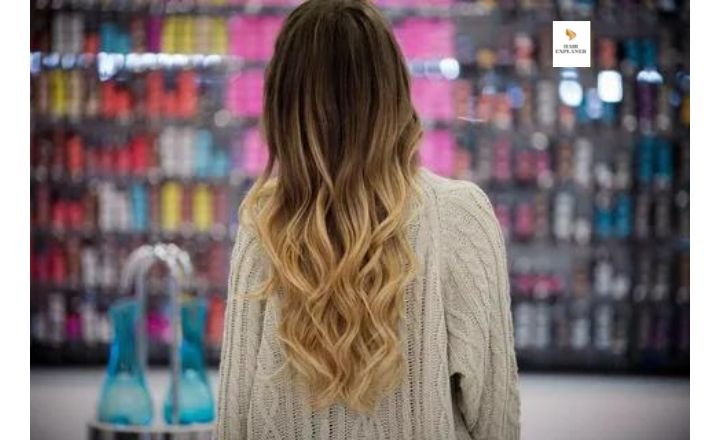
Ombre is unique because it offers many combinations, like deep plum fading into vibrant lavender or chocolate brown blending into caramel blonde. It works well with different hair types and lengths, making it suitable for everyone, from long hair to short bob cuts.
As beauty trends change, new ombre techniques like balayage and somber (soft ombre) have become popular, allowing people to customize their look based on their style and skin tone. Many choose ombre for its low maintenance; the root contrast is less noticeable, which highlights the natural shadowing effect. With proper care using color-safe products, your ombre can stay vibrant longer and give you a fresh, modern look!
What is a reverse ombre?
A reverse ombre is a bold hair coloring technique that turns the traditional style upside down. Instead of darker roots fading to lighter ends, a reverse ombre features bright colors at the roots that blend into darker shades at the tips. This style adds depth to your hair and allows for more personal expression.
One of the best parts of a reverse ombre is how it highlights facial features. Light colors at the top can draw attention to your eyes and cheekbones, creating a striking contrast with the darker hair below. This style looks great on all hair types and lengths, from wavy lobs to long curls.
As a growing trend, a reverse ombre encourages creativity. You can try vivid pastels fading into dark chocolate or bold reds flowing into deep blacks. With so many options, this colorful transformation inspires people to express their unique style and challenge traditional beauty standards.
What’s the difference between ombre and balayage?
Ombre and balayage are two hair coloring techniques that transition from dark to light hair colors. Ombr creates a bold contrast between dark roots and light ends, while balayage offers a softer, more natural look with seamless color blends. Balayage mimics sun-kissed hair with effortless and glowing results.
On the other hand, balayage offers a softer, more natural look. This technique involves hand-painting highlights onto sections of hair, creating depth without harsh lines or noticeable regrowth. The result is sun-kissed strands that blend well with your base color, making it perfect for those who want a low-maintenance style with a radiant glow. Balayage also allows for customization, whether you choose subtle caramel highlights or bright pastel colors, focusing on enhancing your unique personality instead of following trends.
What You Need to Know Before Attempting DIY Ombre Hair?
To get the perfect ombre hair at home, consider your hair color and what you want it to look like. If you have dark hair and want it much lighter, you might need to bleach it several times, which can harm your hair. Before you start, know how healthy your hair is and if it can handle the coloring process.
Different hair textures absorb color in various ways. Fine hair may need less time to process than coarse hair. If you have dark hair, you might need to lighten it on several levels to get the desired gradient. Using good quality bleach is important; cheaper products can damage your hair or cause uneven color.
Preparation is also key. Sectioning your hair properly helps protect your scalp and ensures even results. You can apply protective oils or balms to sensitive areas on your scalp. After applying the dye, don’t rush the waiting time. Letting it sit longer can improve color depth, but be careful not to over-process it.
Finally, accept that imperfections can create a unique look. Ombre is not just about perfect blending; it’s also a way to express your individuality.
1. Ombre Hair Requires Bleach
To achieve the beautiful ombre hair effect, you often need to use bleach. This step is important for transforming your hairstyle from ordinary to stunning. The process involves lightening your natural hair color, and for many people, bleach is essential.
The artistry of ombre goes beyond just applying bleach; it involves knowing how different hair types react to it and customizing the look of each person. Ombre is unique because it blends colors smoothly, starting dark at the roots and becoming lighter at the tips. The key to this soft transition is the technique used. You can use foils for precise color placement or balayage for a sun-kissed effect. A skilled application can greatly enhance the final look.
Choosing a professional stylist who understands your hair type will help you achieve beautiful results while keeping your hair healthy after bleaching. With the right aftercare treatments and toning options, you can maintain a stunning ombre without losing your hair’s shine or vitality.
2. You’ll Need Regular Trims
Regular trims are essential for healthy hair. They act like a reset button, keeping your hair looking fresh and strong. By cutting off split ends and damage, you help your hair grow better and stay healthy from roots to tips. This is especially important for long hairstyles; without regular trims, you may deal with frizz and breakage, which can shorten your hair.
Trimming your hair regularly improves your styling options. As hair grows, its shape can fade, making it harder to style. On the other hand, well-maintained ends give your stylist more opportunities to create beautiful looks, like effortless layers. By making trims a regular part of your routine, you keep your hair looking polished and learn to appreciate every inch of your hair journey.
How To Make Hair Ombre Naturally
Creating a beautiful ombre look at home can be fun and eco-friendly, especially with natural methods. One easy way to achieve this effect is by using chamomile tea, which lightens hair naturally. Brew strong chamomile tea, let it cool, and spray it on the tips of your hair for a sun-kissed look.
If you have darker hair, coffee can help. It deepens your roots and can subtly lighten the ends when exposed to sunlight. Another method is to mix coconut oil and lemon juice. First, apply coconut oil to nourish and protect your hair. Then, mix lemon juice with equal parts water and spray it on the ends where you want a color change. Leave it on for a couple of hours before rinsing. The sun will enhance the effect while you enjoy the outdoors!
Keep in mind that results will vary based on your hair color and type, so embrace your unique look!
How to Get Ombre Hair at Home With Bleach
Creating an ombre look at home can be fun and rewarding if done right. First, gather your materials: good bleaching powder, a developer, gloves, a mixing bowl, and an applicator brush. You might want to use a kit made for ombre; these usually come with clear instructions.
Before you start, do a strand test to see how your hair reacts to the bleach and how long to leave it on for the lift you want. When applying the bleach, focus on the mid-lengths and ends of your hair first. This method creates a smooth gradient from dark roots to light tips, unlike applying bleach all over randomly.
To create softer transitions between colors, use backcombing or teasing. This helps prevent harsh lines that can happen with regular bleaching. After rinsing out the bleach, apply toner if needed to adjust the warmth or coolness of your final color. Don’t forget to deeply condition your hair afterward! Keeping your hair moisturized after bleaching is important for maintaining its look and health.
Step 1. Get an At-Home Bleaching Kit
Choosing the right at-home bleaching kit can brighten your smile without the high cost of a dentist visit. When picking a kit, look at the brand and the amount of hydrogen peroxide and other active ingredients. Kits with customizable mouth trays usually fit better and spread the bleaching agent evenly. Comfort is important because it affects how long you can wear the trays, which is key for great results.
While it’s tempting to want quick results, being patient is important. Many kits whiten your teeth gradually over days or weeks, so knowing this helps you set realistic expectations and avoid disappointment. Enjoy the process! You might want to keep a diary to track your progress, which can help you notice each small change towards a brighter smile. This could even inspire you to try more cosmetic options in the future!
Step 2. Apply Hair Dye or a Toning Gloss
Try different shades with L’Or al Paris Colorista Semi-Permanent Hair Color. You can choose from various colors to give your hair a unique look. A pink or blue can change your appearance and enhance your ombre style.
You can tone your ends for a more subtle change for a sophisticated look. L’Or al Paris Le Color Gloss One Step In-Shower Toning Gloss not only adds ashy undertones to your hair but also conditions it. In just 15 minutes, this gloss revitalizes dull hair, removes brassy tones, and leaves a silky shine that shows you take care of yourself.
How to Do Ombre Hair at Home With Temporary Hair Dye
To start your ombre hair makeover at home with temporary hair dye, choose two colors that go well together, like caramel and honey for a subtle look or lavender and silver for a bold style. Divide your hair into two sections, with the darker color on the bottom and the lighter one on top.
Protect your clothes and area before you start coloring. Blend the colors smoothly to create a natural transition from dark to light. Mix the shades for a soft gradient effect using a comb or brush. Follow the product instructions for timing. After washing and drying your hair, style it as you like to show off your DIY ombré hair confidently.
Step 1. Pick Two Shades of Temporary Color
Create a beautiful ombre hair look easily with L’Oréal Paris Colorista Hair Makeup Temporary 1-Day Hair Color Spray. Choose two colors that go well together, like Rose Gold and Hot Pink or Pastel Lavender and Purple, to blend from light to dark shades.
This temporary dye lets you try different color mixes without a long commitment, making your hairstyle more fun. Whether you want a splash of color for a special occasion or just a change for a day, this hair makeup is perfect. Applying and washing out with shampoo is simple, so you can switch colors whenever you want.
Be creative and experiment with different combos to find the best ombre effect that fits your style and personality.
Step 2. Spray the Darker Shade on the Top Section of Your Hair
Spray the darker shade on the top of your hair and see the change happening. It’s not just about coloring; it’s a chance to show your style and creativity. Don’t worry about where to start the color – at the roots or a bit lower; trust your feelings.
While the color dries, notice how each strand of hair absorbs and reflects light, making a unique mix of colors on your hair. The beauty is not just in the final look but also in the process – a journey of self-expression with every spray and flick of hair. Remember, real beauty is not about fitting in but showing what makes you special.
Step 3. Spray the Lighter Shade on the Mid-Lengths and Ends
After you apply the lighter shade to the mid-lengths and ends of your hair, let it dry completely. This helps the color blend well with your natural hair color. While waiting for your hair to dry, prepare your styling tools and think about how you want to show off your new hair color.
Styling your hair after coloring can make you look better and highlight the new color. Try different hairstyles to enhance the lighter shade on the ends. Whether you prefer loose waves or straight styles, changing your hairstyle can make your hair transformation more noticeable. Use this time to be creative and enjoy the vibrant new color of your hair.
How To Do Ombre Hair Color Technique
Want to know how ombre hair is done? Here’s a step-by-step guide for what to expect at the salon.
Shading The Root
Picture going to the salon with gray roots or grown-out highlights near your scalp and leaving with a smooth blend that looks completely natural. This change starts with your stylist carefully coloring your roots. It is not just about hiding those annoying grays; it is about making your hair color-balanced and creating a flawless transition from root to tip.
Root shading might seem like a small part of coloring your hair, but it makes a big difference. Focusing on the roots first creates a strong base for a polished look that enhances your entire hairstyle. It’s like preparing for the main event – whether you’re refreshing your current color or trying something new, shading the roots sets the tone for a beautiful final look that shows confidence and style.
Mix The Bleach/Dye
The stylist mixes bleach or dye carefully to ensure it sticks to your hair smoothly. This shows the stylist’s skill and sets the stage for a big change. Watching the mixture being made feels magical. The precise mixing of ingredients shows the expert’s skill. It’s not just about coloring your hair; it’s about creating art that fits your natural beauty.
Each brushstroke tells a new part of your hair’s journey to its final color. The mixture is applied carefully to coat every strand evenly for a perfect result. Enjoy this moment of change as your hair gets a new color and vibrancy.
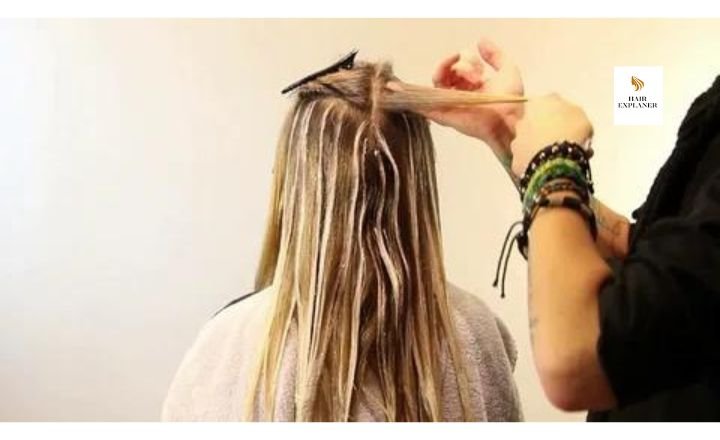
Section The Hair
The stylist separates your hair into sections to create the desired style. This helps them focus on each part, ensuring precision and control. Dividing your hair makes it easier to see and work with, leading to more accurate results. This method ensures that every strand is styled properly and the stylist maintains a consistent approach.
Apply The Bleach
Bleaching your hair is a careful job that needs skill. To get a smooth color change, apply the bleach lower than where you want the fade to start. Blend the bleach upwards towards the untouched hair to gradually shift color. This helps avoid sharp lines and gives a softer appearance. Professionals stand out from DIY attempts by paying attention to these details.
Placing individual hair strands before using foil or saran wrap may seem precise, but it ensures even coverage and avoids bleach overlapping on other hair. This step-by-step method guarantees consistent results and shows off your stylist’s skill. This process can give you well-blended highlights or fancy ombre effects that add depth and dimension to your look.
Shampoo The Hair
After bleaching or dyeing your hair, it’s important to shampoo it to keep it healthy and vibrant. Use a sulfate-free shampoo to gently clean your hair without removing its natural oils, making it soft and easy to manage. This is crucial to caring for your hair after coloring to ensure your new color looks its best.
Adding a toner after bleaching can help you get the desired color by balancing unwanted tones and improving the overall result. It lets you adjust the shade, whether you want a cool blonde or a warm caramel color. Including this extra step in the coloring process can help you achieve professional-looking results at home.
Blow Dry The Hair
After your salon visit, the last step is blow-drying your hair. This is when your damp hair quickly becomes fabulous with the warm air. It adds volume and bounce, giving you a polished look that shows confidence. Enjoy this relaxing time and let the stylist do their magic so you feel amazing when you leave. Blow-drying is an art that can enhance your appearance.
Choosing loose waves or curls as your final style highlights your new hair color. These soft textures give your hair movement and make it look fuller and more vibrant. Instead of basic styling, pick a look that shows your personality and complements your new hair color.
How to Take Care Of Ombre Hair
To keep your beautiful ombre hair looking great, use the right products. Get color-treated shampoo to keep your colors bright and prevent fading. Use purple shampoo to eliminate any unwanted brassy tones in your colored hair. Apply a heat protectant to prevent damage before using hot tools to style your ombre hair.
Caring for your hair this way, you can keep it healthy and looking good.
1. Use a Sulfate-Free System for Color Treated Hair
To keep your hair vibrant and colorful, use a sulfate-free system made for colored hair. The L’Or al Paris EverPure Sulfate-Free collection protects and nourishes your hair, making it strong and healthy. Say goodbye to dry, weak hair and hello to shiny, healthy locks.
Colored hair, especially ombre styles, can get damaged easily, So sulfate-free products can protect your hair from damage and help your color last longer. These products maintain your hair’s health and appearance by creating a barrier against harmful elements. Don’t settle for dull hair – use sulfate-free care to keep your color fresh and vibrant.
2. Maintain Your Color With Purple Shampoo
Keeping bleached hair vibrant can be tough, but using L’Oreal Paris EverPure Brass Toning Purple Shampoo helps eliminate brassy tones. This shampoo has purple dyes that neutralize yellow and orange hues in blonde, bleached, and silver hair. Using this shampoo every few washes or once a week keeps your color fresh and bright for longer.
3. Air Dry Your Strands
Air-drying your hair is a way to care for it. It helps your hair recover from heat damage and makes it healthier. Using a leave-in conditioner can enhance your natural curls without using heat-styling tools. This saves time and gives you a more carefree hairstyle. Taking a break from hot tools is a chance to celebrate and nourish your hair’s unique beauty.
How long does it take to ombre hair?
Achieving a beautiful ombre hair look can take different amounts of time. Factors like hair length, thickness, and the shade you want can affect how long it will take. Shorter or thinner hair may be quicker to do compared to longer or thicker hair.
A professional stylist usually takes 1.5 to 3 hours to do an ombre treatment. This includes preparing the hair, applying bleach or dye, and waiting for the color to blend. It’s important to be patient and trust your stylist for a smooth transition from dark roots to lighter ends.
How often should you ombre your hair?
Getting the perfect ombre hair can be exciting and a bit nerve-wracking. One common question is how often to return to the salon for touch-ups. The frequency of touch-ups depends on your natural hair color, the ombre look you want, and the health of your hair. If you have dark hair, you might need touch-ups every 6-8 weeks to keep your hair looking vibrant and blending well with the lighter ends.
If you have lighter hair, you might be able to wait longer between appointments, around 10-12 weeks, before your roots start to show. Other things like sun exposure, how often you use heat styling, and the hair products you use can also affect how often you need to refresh your ombre look. It’s important to talk to your stylist to develop a maintenance plan that works for your hair and lifestyle.
How can I stop my ombre from fading?
Use a good color-safe shampoo and conditioner to keep your ombre hair looking fresh and vibrant. These products protect colored hair and avoid sulfates that can fade the color. Also, use a deep conditioning treatment once weekly to nourish and hydrate your hair and prevent fading.
To stop your number from fading, wash your hair with lukewarm or cool water instead of hot water, making the color fade faster. Additionally, use UV protection products to shield your hair from the sun, which can cause fading. Following these tips, you can make your ombr hairstyle last longer and look great for weeks.
Conclusion
How To Ombre Hair At Home : Use a good color-safe shampoo and conditioner to keep your ombre hair looking fresh and vibrant. These products protect colored hair and avoid sulfates that can fade the color. Also, use a deep conditioning treatment once weekly to nourish and hydrate your hair and prevent fading.
To stop your number from fading, wash your hair with lukewarm or cool water instead of hot water, making the color fade faster. Use UV protection products to shield your hair from the sun, which can cause fading. Following these tips, you can make your ombr hairstyle last longer and look great for weeks.
Frequently Asked Questions
How to ombre hair with 2 colors at home?
To create ombre hair with two colors at home, choose colors that go well together. Divide your hair into sections and put the lighter color on the ends, blending it up. Then, apply the darker color from the middle and blend it down to meet the lighter color at the ends.
How to ombre hair professionally?
Carefully divide your hair into small sections to get a professional ombre hair look. Apply bleach or lightener to the ends and blend it toward the roots. Blend the colors smoothly for a natural transition between shades. Use good products and work carefully to avoid harsh lines or uneven color.
How to do ombre hair at home?
Dyeing your hair at home to get ombre hair is a fun and affordable way to switch up your style. Get a good ombre hair dye kit in the color you want. Divide your hair into four sections and secure them with clips. Follow the kit’s instructions to mix and apply the dye, blending it well from dark at the roots to light at the ends.